
Default Blogger Contact Form has not professional look. You can customize it.Follow some simple step to do this.
Step one : Adding Default contact form
- Sign into your blogger account.
- Go to the Blogger Dashboard/Overview.
- Select Layout.
- Click on the Add a Gadget.
- Click Contact Form Gadget and then Save it.
- Go to the Template section and click on the Edit HTML button
- find the style ending code : ]]></b:skin>
- Paste given CSS code just above ]]></b:skin> .
- Save template.
Code : div#ContactForm1 {display: none !important;}Step Three : Adding Contact Form to a Page
1. Create A New Page.
2. In HTML Section of Page Paste the Given Code (After </div) Closing tag.)
3. Give code Give it some title like Contact Us.
3. Save and Published it.
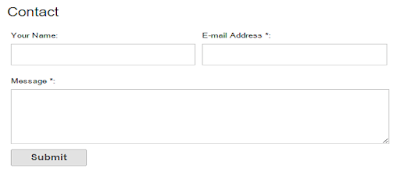
Your Customize Contact Form Added to your Static Page. :) Your Contact Form look like this.<style> .contact-form-widget {color: #000;margin-left:auto;max-width: 100%;margin-right:auto;padding: 0px;width: 600px;} .form_name, .form_email {float:left;width:48%;padding:5px;} .form_message {padding:5px;} .contact-form-name, .contact-form-email {font-size:16px;width: 100%;height:40px;max-width: 100%;margin-bottom: 10px;padding:10px;} .contact-form-email-message {height:100px;width:100%;font-size:16px;max-width: 100%;padding:10px;margin-bottom:10px;} .contact-form-button-submit {font-size:16px;height:30px;border-color: #C1C1C1;width: 20%;background: #E3E3E3;max-width: 20%;color: #585858;margin-bottom: 10px;} .contact-form-button-submit:hover{color: #000000;border: 1px solid #FAFAFA;background: #ffffff;} </style> <div class="contact-form-widget"> <div class="form"> <form name="contact-form"> <div class="form_name"> Your Name: <input class="contact-form-name" id="ContactForm1_contact-form-name" name="name" size="30" type="text" value="" /></div> <div class="form_email"> E-mail Address *: <input class="contact-form-email" id="ContactForm1_contact-form-email" name="email" size="30" type="text" value="" /></div> <div style="clear: both;"> </div> <div class="form_message"> Message *: <textarea class="contact-form-email-message" cols="25" id="ContactForm1_contact-form-email-message" name="email-message" rows="5"></textarea> <input class="contact-form-button contact-form-button-submit" id="ContactForm1_contact-form-submit" type="button" value="Submit" /> <br /> <div class="contact-form-error-message" id="ContactForm1_contact-form-error-message"> </div> <div class="contact-form-success-message" id="ContactForm1_contact-form-success-message"> </div> </div> </form> </div> </div>
Liked My Post ?


 Need Mobile Help ! Discover More your mobile phone.
 Make faster your PC in some simple steps !
 Hidden Facebook Tricks ! Learn Now.
 Download beautiful blogger template Free To Use.
 Customize Your Blogger Template-Solved Out
 Reduce Internet Charges ! Learn how with many internet focused tutorials


0 comments:
Click Here To add Comment
Post a Comment
Your Suggestions are valuable for me.